Modem Rostelecom f st 2804. Sagemcom router: step-by-step setup for a teapot
Rostelecom router Sagemcom f@st 2804 v7 is a branded hardware and software product designed to connect client equipment and mobile devices to the Internet at speeds of up to 300 Mb/s. The router is capable of receiving an IPTV signal after appropriate configuration. It is optimized by the manufacturer to work in the network of the largest domestic telecommunications service provider, OJSC Rostelecom. The device supports connection via ADSL (telephone cable) and Ethernet (four- or eight-wire twisted pair cable).
The router belongs to the budget series of Rostelecom modems. It is distinguished by high build quality, ergonomic shape, sufficient functional parameters and good technical characteristics. On the top plane of the case there is a USB 3.0 connector and two keys for disabling the wireless connection and activating WPS technology.
In appearance, the device resembles the popular dlink dir 300 model. An information label, which is glued to the bottom surface of the device, provides the SSID and password for logging into the router’s web interface.

Main characteristics of the router
In addition to standard network traffic distribution and IPTV signal reception, the f@st 2804 v7 model from Sagemcom supports:
- creation of a backup broadband channel;
- the ability to use the device as a print server;
- the ability to perform the functions of a network storage device (for this you will need to connect an HDD or SSD to the router via a universal USB bus, which will make it a miniature web server with simultaneous access to data from several client devices).
The router is compatible with the 802.11b/g/n WFA specification and provides full operation with 3G modems. There is a built-in DLNA server. The CPU performance is sufficient to simultaneously process requests from several client devices to provide quick access to multimedia content.
You can watch IPTV in FHD quality (1080 p). Switching to the Internet is carried out by connecting a telephone cable to the ADSL input connector (asymmetric digital subscriber line) or a twisted pair cable with an RJ-45 connector to a high-speed WAN port. The device consumes less than 10 W of electricity and has dimensions of 185x110x30 mm (LxWxH).

Delivery list
The standard delivery package of the router includes:
- The device itself.
- 12V power adapter.
- Telephone cable with RJ-11 connector.
- Quick user guide.
- Splitter (signal splitter into telephone and high-frequency modem).
- CD with a proprietary utility - automatic network configuration wizard.
In the box with the router you can also find a warranty card valid for 1 year.
Preparing the Sajemcom router
First, you need to supply power to the Rostelecom Sagemcom router. Before setting the router parameters, you must correctly connect the computer’s network card (discrete or integrated into the motherboard) with a patch cable to the device’s LAN connector, highlighted in yellow. A characteristic click should be heard.
If the connection is made via a telephone cable, the plug is inserted into the ADSL port. When using Ethernet technology, the connection is made through the WAN connector. If the router is connected using twisted pair, the LED indicator will turn green, but there will be no access to the Internet without setting the access parameters.
Authorization in the web interface
To enter the control panel, you need to launch a browser on your computer and enter the device’s IP address: 192.168.1.1. These are the standard factory settings. An authorization window will appear. The password admin is entered here. The username is the same. The login/password pair can be changed in the security settings of the web interface.

Updating the router shell
The firmware is updated using the CD included in the package. This will ensure the device operates correctly and supports all functions. If the operating system is configured to automatically launch programs from removable media, then the welcome window of the Rostelecom Hardware Configuration Wizard will immediately appear on the screen. Otherwise, you need to activate the utility manually by double-clicking on the executable file. Set the marker in the dialog box that opens to the item “Updating a universal router” and click “Next”.
Removing unnecessary factory connections
The default router creates initial connections that are not working. They must be removed to avoid errors in the operation of the device. To do this, perform the following step-by-step algorithm:

After this, the window will refresh again. Click the last menu line called “ETH Interface”. The page will reload again and the factory configuration will disappear.
Automatic installation of the Sajemcom 2804 router using the Hardware Setup Wizard
In the main window of the configuration wizard, you need to select the “Full configuration of a universal router” option and click the “Next” button. All that remains is to wait for the end of the procedure, during which the following operations are carried out:
- The optimal router configuration is selected.
- The required PPPoE connection parameters are set.
- A separate channel is reserved for 3G.
- The availability of the provider’s equipment and the compatibility of the subscriber’s device with it are diagnosed.
- The VCI and VPI values are set.
When the configuration of the Rostelecom Sagemcom router is completed, click the “Apply” button and reboot the equipment.
How to configure fast 2804 v7 router manually
You can configure your computer's router and network adapter yourself. This need arises when there is no installation disk. This method is also suitable for experienced users who prefer to do everything themselves. Configuring adapter settings on Windows 10 is similar to this procedure in other versions of the OS developed by Microsoft.
The Sajemcom fast 2804 router supports several options for connecting to the Internet:
- ADSL.
- High-speed fiber optic cable using FTTB technology.
- Building a home wireless network.
- Work in print server mode.
The functionality of the model includes receiving an IPTV signal, which can be configured manually with individual installation of the desired parameters.
Ethernet connection
To configure an Ethernet connection in the router’s web interface, you need to click on “Advanced settings”, go to the ETH service, select “eth0/eth0” and set it to “VLAN/MUX”. When exiting, save the changes by clicking on the corresponding button at the bottom of the window. We go to the “WAN service”, click “Add” and select the “eth0/eth0” parameter in the list that appears.

On the next page we assign the value “-1” to the PPPoE connection by entering it in the two fields below. Click “Next”. Here we enter the login and password from the agreement with the provider. Check “Enable NAT” and “Firewall”. We skip subsequent pages by clicking the “Next” button everywhere. When you exit the Setup Wizard, save the changes you made.


Wireless network in the router
The model supports all existing wireless communication standards and allows you to create multiple guest connections. Wi-Fi parameters are set in the “WLAN” section of the router’s additional settings control panel. Here you can enable IGMP - a special multicast protocol. To activate the Wi-Fi module, in the first section of the WLAN settings menu, you must check the “Enable wireless communication” checkbox.

How to set up with an ADSL connection
A connection to the Internet using ADSL technology is established in the “ATM PVC Interface” item of the WAN service. The automatically generated PVC 8/32 connection is located here. It must be deleted by first checking the box. By clicking the “Add” button, we create our own connection and indicate the VPI/VCI parameter - “0/33”, entering it in the field located next to it. DSL Link is set to “EoA”, and encapsulation is set to LLC. After completing the basic settings, reboot the router.
To set the necessary parameters of the 3G modem, you need to connect it to the router via a USB port. The setup algorithm is as follows:
- In the router control panel, select the “3G Configuration” section.
- Set the marker to “Enable 3G backup”.
- Save the changes made.

With these settings, the device will turn on 3G if an ADSL or Ethernet connection is unavailable. IPTV does not function in this mode.
Setting up a router to work with a TV set-top box
To activate and configure IPTV, follow these steps:
- In the “Layer 2 Interface” section of the router’s control panel, open another communication channel.
- Create a new object in the WAN service.
- Set its connection type to “Bridge”.
- Apply the changes.
After that, in the LAN settings, check the box next to “Disable DHCP server” (a technology developed by Sony to protect digital content from illegal copying and distribution). Then enable "IGMP Shopping" and "IGMP Proxy".
Possible problems
When setting up the Sagemcom f@st 2804 v7 router, technical problems sometimes arise. In this case, the network connection indicator, marked with the “@” icon, glows red and a message appears on the computer screen indicating that the router is not detected or is unreachable.
This can be fixed by switching the patch cable to another LAN port. There may be errors in identifying the router due to the lack of factory settings. In this case, you will have to enter all the necessary values manually. To configure the device correctly, it is recommended to connect it to the computer via LAN port No. 3.
Many owners of the Rostelecom Sagemcom f st 2804 v7 router prefer to configure the Internet and IP-TV themselves, since modern firmware versions allow even an ordinary user to do this. If you also wondered how to configure the Rostelecom fast 2804 v7 router, then this article is just for you. In it we will analyze in detail the process of setting up the connection itself and the parameters of the future wireless network.
Preparing the router
First of all, we need to correctly connect the Rostelecom Sagemcom f st 2804 v7 router. To do this, connect the power cord to the rear panel. Then, if you are using a telephone connection, insert the Internet cable into the first slot. If your home has fiber optics or any other connection using a standard Ethernet cable, insert it into the first of the next four ports.
After that, turn the router face down and look at the indicators that light up:
- “Power” – lights up in any case if the router is connected to the network;
- “DSL-link” - shows us that the fast 2804 Rostelecom router receives a signal from the provider’s servers, so it should be on;
- “WiFi” – enabled by default in all Rostelecom modems;
- “LAN” – lights up if the cable is connected correctly.
Important: as you understand, even with factory settings, the router can “distribute” a WiFi signal. So there is no need to configure it separately. But, if you want to change the network name or the set password, you can find instructions for this later in the article.
I would also like to note that while setting up the Rostelecom f st 2804 v7 router, you may have a question: what is this USB port on the back of the case? Answer: This is a standard USB for connecting your portable Internet (connect) in case of a loss of connection with the main provider or the need to use this type of repeater on several devices at once.

Setting up a Rostelecom fast 2804 v7 router
The first stage of setup is entering the main interface. It is done through the browser:
- launch an internet browser that is convenient for you;
- In the address bar field, enter the IP of your router: 192.168.1.1;
- In the Login and Password fields, enter the keyword “admin” in lower case.
If everything is done correctly, you will be redirected to a new page in the same tab, where the main menu will be located on the left on a blue background. We will work with him.

Resetting basic settings
If you are setting up a Rostelecom fast 2804 router that has already been used in another place or because the settings have been lost, then all settings must be returned to the factory values. You can do this as follows:
- go to the last menu item “Management”;
- open the first subsection “Settings”;
- find and click on the submenu item “Reset”;
- in the middle of the page we see a button “Restore default settings”;
- click on it;
- Click OK in the confirmation window that pops up;
- We wait until the reset operation is completed and we will be transferred again to the main page of the web interface.
All is ready! Now the Rostelecom fast 2804 v7 router can be configured.
Removing unnecessary factory connections
Since after resetting all parameters the router creates several initial non-working connections, the first thing you need to do is delete them so that there are no errors during operation. This is done in several steps.
- in the main menu on the left we find “Advanced settings”;
- in the submenu that pops up, open “WAN service”;
- in the updated window we see a table of three points (three connections), on the left side of which there is a “Delete” column, put a checkmark in all of them;
- under the table we find the “Delete” button, click on it;
- in the updated window we see an empty table.
- Still there, in “Advanced settings”, open the item “Second level interface”;
- the first section of the submenu is “ATM PVC Interface”;
- delete the only table item in the same way as in the previous step;
- waiting for the page to update;
- open the last item of the submenu that pops up – “ETH Interface”;
- delete the existing row in the table in the same way;
- We observe a page reload and the disappearance of the remote configuration;
Direct setup by Rostelecom Sagemcom f st 2804
After the cleaning is completed, the Rostelecom fast 2804 router is deeply configured:
- return to the “ATM PVC Interface” and click on the “Add” button;
- on the page that opens, indicate the Internet connection data: VCI and VPI;
- We leave all other points unchanged;
- scroll down the page – “Apply/Save” button;
- in the same way, we add a connection for IP-TV by clicking on “Add” (only the VCI will change, in most cases).
The Rostelecom f st 2804 v7 router is connected on the “WAN service” tab:
- click “Add”;
- select the created configuration – “Next”;
- indicate the type of service used (in most cases PPPoE);
- on the page that opens, enter the user data (login/password) specified in the Internet service agreement;
- In the same place, select the desired name for the connection (“PPPoE Service Name”);
- check that there is a checkmark next to the item “PPP repeat...”;
- click “Next”;
- Move the “ppp1” route you created to the left column if it is in the right. then move the USB connection in the opposite direction;
- We perform the same operation and “Next” again.
 We see the list of final settings and make sure that in the second line opposite “NAT” the “Enabled” option is indicated. If this is not the case, we return to the stage of specifying the connection login and password and check the boxes on this page that include NAT and Firewall. Apply the changes made.

How to configure the fast 2804 v7 Rostelecom router for IP-TV? Very simple! We repeat the first three points from the algorithm above, only we select the second created configuration (in the second step) and the Bridge connection type instead of PPPoE (in the third). Move on, save the settings and voila! There is Internet!
How to connect the Rostelecom f st 2804 router to WiFi
The firmware of the Rostelecom f st 2804 v7 router implies initial settings for a wireless connection. To change them, you need to do the following:
- main menu item “WLAN Settings”;
- go to the “Main” submenu;
- check the box to enable wireless communications;
- change the SSID to any network name you like and save the changes;
- go to the “Security” submenu;
- disable WPS (the weak point of the wireless connection, which is easy to hack);
- we check that our network name is selected and change the standard password to the one we created (the field after the “Authentication” item);
- We save the adjustments made.
That's all, we figured out how to configure the Rostelecom Sagemcom f st 2804 router on our own.
Summarizing the above material, we can say that connecting a router to the Internet comes down to four steps:
- reset;
- removing standard connections;
- creating a new PPPoE port;
- changing WiFi settings.
Having mastered these steps, you yourself will be able to configure and tell others how to connect the Rostelecom f st 2804 router to the network.
Important: the VPI and VCI values discussed in the article are unique for each region of Russia. Therefore, they must first be clarified with the provider, or found on the Internet.
The entire algorithm described above is clearly demonstrated in this video:
What other questions did you have during setup?
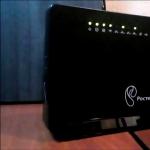
We turn on the modem, connect it to the PC, connecting with a cable any Ethernet port of the modem to the connector of the PC’s network card.
By default, the modem has a DHCP server enabled, so in the network card settings you can select the option - “Obtain an IP address automatically"or enter addresses manually by setting the following values:
IP address - 192.168.1.2 to 253
Mask - 255.255.255.0
Gateway - 192.168.1.1
DNS 1st - 195.46.116.1
DNS 2nd - 195.46.96.1
Launch the web browser, enter the address in the address bar - 192.168.1.1 and on the keyboard press the " Enter."
A login and password entry window appears on the screen, in which you need to enter the following values: User - admin and password - admin. You can check the box "Save password", then you won’t have to enter them when you reconnect to the modem.
Attention!!!
If the login and password entry window does not appear during connection, try switching the Ethernet cable from the first port of the modem to the second and try again. If there is no connection to the modem on all four Ethernet ports, you must use the command ping 192.168.1.1 check the availability of the modem by also connecting to each port one by one. If there are no responses, as shown in the figure below, the modem must be replaced. Most likely it is faulty!!!

If a window appears when connecting, then enter in the fields “ User" and "Password" - the word "admin" " and press the button " OK ", as it shown on the picture:

If the data is entered correctly, the following window will open:

In the upper right corner, highlighted in blue, information about the line status and modem connection speed is displayed. Internet network availability indicator - relevant when the modem is configured to Router.
The table in the center of the screen (highlighted in red) shows the software version installed on the modem - this information is very important!!!
Features for firmware version - 6.35 and 6.41
In the factory settings of the modem, one PVC with values of 1/69 is registered on it
The 1st Ethernet port of the modem is reserved for an external WAN connection, and therefore it is not possible to connect to the modem through it (the ping command also does not work).
Below we will consider the sequence of steps to configure the modem for:
Internet access,
Interactive TV set-top box connections,
Enabling Wi-Fi and transmitting multicast traffic via Wi-Fi.
We will show you how to enable/disable the DHCP server and the ability to forward ports to organize access from the Internet to internal resources located on the user’s local network.
Before you start setting up the modem, especially if it was previously configured for other services, or installed by another user, we strongly recommend that you perform a factory reset procedure. This can be done by pressing the button on the back panel of the modem - “ Reset "and hold it with the modem power on for more than 20 seconds. The second option is to perform this operation by selecting the items “ Management » - « Settings options" - " Reset " and in the central part of the window click on the button "Restore default settings" and confirm your choice by clicking on the " OK ":

As a result, a window will appear with the following message (highlighted in red):

After 2 minutes you can start setting up the modem.
The first thing you need to do for a modem withFirmware version 6.35 and 6.41- this is to enable the ability to use the 1st Ethernet port to connect a computer. To do this, go to the menu item “Additional settings", then submenu "Level 2 interface" and the menu item " ETH interface " and in the table that opens, delete the interface " eth0/eth0 ", which is written there by default:

To do this, check the box and click on the “ Delete “As a result, the table will become empty and through the first Ethernet port you can connect and configure the modem and work on the Internet!!!
For a modem with firmware version 5.47 - go to the ETH interface menu, no need to go!!! Since by default it does not have a port assigned for an external WAN connection.
Then select the menu item "Additional settings", submenu "WAN service ", mark all the entries in the table by checking the box " Delete "(highlighted in red in the figure below), and delete them by clicking on the corresponding button:

The result should be an empty table, as shown in the figure below:

Then go to the submenu “Level 2 interface" and select the submenu " ATM PVC interface ", here we also delete all records in the table by checking the box " Delete " and clicking on the corresponding button:

As a result, we get an empty table:

Now here we begin to add records with the values we need PVC . Let us remind you that to access the Internet the following values are used: 0/35 and 0/100 , and for the interactive TV service to work, the following values are required: 1/35, 1/36 and 1/37 mandatory prescribed in the regime bridge.
Press the button " Add " and in the window that opens we see the following elements:

Fields highlighted in red - need to be changed according to those values VPI/VCI , which need to be added, the default value is 0 and 35 - such values are needed, so we do not change them.
Pay attention to the element highlighted in blue - it says that if you add PVC will be set to mode PPPoE or Bridge , then the value should be - EoA. This is the default - don't change it!!!
Below in the same window, leave the remaining elements unchanged and click on the button - “Apply/Save" - as shown in the figure below.

We add in the same way PVC with VPI/VCI values of 0 and 100:

and then three more entries with values VPI/VCI - 1/35, 1/36 and 1/37 respectively. The figure below shows only the addition PVC with 1/35 values - to add entries PVC with values 1/36, 1/37 - similar actions.

The result is a table with five records - as shown in the image below:

Go to the menu " WAN service "and configure the operating mode of the ones we added PVC , pressing the button - " Add " as shown in the picture below:

In the window that opens, at the bottom, there is a drop-down list containing the names PVC , they are usually listed in this list in the order they were added.

Let's start in order and set up PVC to access the Internet. Press the button " Further " and in the form that opens, set the operating mode of the modem.
If it works in mode - Bridge , then we mark the position - Bridging

For Bridge mode everything is quite simple, click on the button “ Further ", a window appears, as shown in the figure below, in which, after clicking on the "Apply/Save» - selected mode for this PVC - saved and recorded in the table:

To add other PVCs, press the button “ Add "and configure them:

Let's take a closer look at the setup process PVC with values 0/100 in PPPoE mode (Router).
:

Selecting the PPP over Ethernet option , click on the button “ Further ".
For firmware version 6.41:

Select the option "PPP over Ethernet" "check what's in the dropdown list" Network Protocol Selection "The value is set to " IPV4 Only " and click on the button " Further ".
In the next window, enter the login and password from the contract. The service name can be specified - inet . We put a tick in the position - “Repeat PPP on authentication error»:

We don’t change anything else on the form and at the very bottom click the button - “ Further ".
For firmware version 5.47 and 6.35:
In the next window, leave everything unchanged and click the “ Further ":

In the window " DNS server configuration"We also do not change anything and press the button " Further ":

For firmware version 6.41:
In the window that opens, in the list "Available routed WAN interfaces"(highlighted in green) select the value " ppp1.1 " and transfer it using the button (highlighted in blue) to the field "Selected Default Gateway Interfaces" (highlighted in red) and press the button " Further ":

In the next window "DNS server configuration" carry out the transfer of value " ppp1.1 " from the field on the right side "Available WAN interfaces" using the button (highlighted in blue) in the " fieldSelected DNS server interfaces" and press the button " Further ":

As a result, we see the final form:

To save the settings, click the "Apply/Save».
We configure the mode " Bridge » those PVCs that prescribed Interactive TV services for operation - they matter - 1/35, 1/36 and 1/37 . The setup is carried out similarly to the actions that were shown in this instruction above in the text, when registering PVC with the values 0/35 .
As a result, we have five in the table PVC, as shown in the picture below:
For firmware version 5.47 and 6.35

For firmware version 6.41

If you will connect a TV set-top box, then you need to group the ports; to do this, in the menu on the left, select the item - “Interface grouping».
In it we will create a group uniting PVC with values 1/35, 1/36, 1/37 with the fourth Ethernet port of the modem:

Click on the button " Add "and in the form that opens, fill in the fields, as shown in the figure below, set the group name - IPTV and grouping PVC (1/35, 1/36, 1/37)
For firmware version 5.47 and 6.35

For firmware version 6.41

and select the 3rd Ethernet port - eth3 , since the count starts from zero, in fact this will be the 4th port of the modem:

To save the settings, click the button at the bottom “Apply/Save"As a result, we see in the table a created group with the name - iptv:
For firmware version 5.47 and 6.35

For firmware version 6.41

Note that when enabled DHCP -server - into the port dedicated for connecting a TV set-top box - addresses are not distributed, so you don’t have to turn it off. This is a definite advantage when connecting via Wi-Fi.
Turning on Wi-Fi
Select the item " WLAN setup »

Default Wi-Fi enabled, this is indicated by the marked field - “Enable wireless network" If you uncheck this checkbox, Wi-Fi will not work.
Mark in the field - "Enable multicast transmission via wireless network» - allows you to use an IPTV player to watch channels on a PC connected via WiFi . There is no need to make changes to grouped interfaces!!! It should be remembered that if the set-top box is turned on and the IPTV player is running at the same time, only one of them will work, since the speed will not be enough.
If the checkbox is not checked, as shown above, then multicast traffic will not flow over Wi-Fi!!!
SSID field - this is the name of the wireless network that will be displayed when searching for all available networks, so we recommend that you write here after the word ROSTELECOM, the house number and apartment number - for example: Rostelecom_312_33
Go to the menu item - “ Safety " and set the values of the drop-down fields as shown in the figure below.

In the WPA/WAPI password field - enter the password that will be used as a key when connecting to this access point. As a rule, a password is prescribed to connect to the Internet.Apply/Save».
Disabling the DHCP server.
If you need to disable the DHCP server, you need to select “Additional settings", then submenu " LAN " and put a dot in the position - "Disable DHCP server»:

To save the settings you need to press the button - “Apply/Save»
Remote desktop access on the user's PC
To organize access from the Internet, for example, using the “Remote Desktop” application on the user’s PC, you need to select the menu item “Additional Information", submenu "NAT" - subsection " Virtual servers"and carry out the settings as shown in the figure below:

Use interface- you need to select from the drop-down list exactly the one through which it rises PPPoE connection.
Service name - you can select from the drop-down list of preset values or set it manually, as is done in the example - a name has been entered RDP.
IP address - the field must contain the value of the IP address on the network card of the PC in the user’s network to which he wishes to access - in our example - 192.168.1.3
The range of external ports and the range of internal ports must be indicated; if there is only one port, then the same values are indicated - in our case, the port for remote access - 3389 it is on this port that the application runs "Remote Desktop».
To save the settings you need to press the button - “
We also recommend
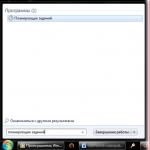 How to turn off the computer after a certain time and more than one Forced shutdown of the computer
 Sagemcom router: step-by-step setup for a kettle
 What is a key in Steam and how to activate a game on Steam How to activate a key in the mobile version of Steam
 How to deal with the cost of Hearthstone
 Unpredictable Lucky block in Minecraft PE Mod for lucky blocks with cool things
 Download hello neighbor map for minecraft pe How to make a map in minecraft hello neighbor