How to partition a hard drive on a netbook. How to partition a disk with Windows installed without losing data
The need to split a hard drive into several logical partitions arises in order to protect personal data. On the first logical volume, leave only the system with programs, and on the rest, place other information - in order of importance.
For example, movies, program installation files, music, e-books should be stored on the second partition. It would be a shame to lose photos and videos from your trip; they should be placed on the third page. Especially if they are in a single copy and there are no copies left on a digital camera or smartphone.
Reference. Administrators in organizations do this. In wealthy companies, departments are allocated separate hard drives with a complex scheme for delineating usage rights.
Methods
Within a home computer, there are three ways to partition a hard drive:
- using standard Windows tools;
- using specialized programs;
- when installing/ .
- Control Panel\All Control Panel Items. On the page that opens, click on Administration;
- Control Panel\System and Security\Administration.
Let's consider each of the three methods in detail.
By regular means
Where is?
There are different ways to access the Disk Management utility.
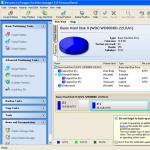
The easiest way is to click the Start button and in the search bar (where it says Find programs and files) type the word Management. The first paragraph will contain the program we need: Computer Management. Click on it. Our utility will be displayed in the Storage devices section.
IMPORTANT! Windows 10 has a built-in Windows Search feature. Located next to the tile image (Start button). When prompted above, the Computer Management application appears.
The second path is for the advanced. In the search bar, type diskmgmt.msc (from the phrase disk management). The resulting output will indicate our desired program.
The third way is through the Control Panel. Open Explorer and insert one of the queries into the address bar (where the word library is):
On the page that opens, find the shortcut to the Computer Management program.
Dividing the space
The previous stage is completed and the window of the built-in disk space management tool is opened. Our hard drive with logical drive C is displayed in front of us. Let's create a new one.
- left-click on the current section;
- Right-click and select Shrink Volume from the drop-down menu. We are waiting for the free space to be calculated, and we see a window with compression parameters;
- Only one parameter is available - Size of the compressed space. The amount of space is indicated in megabytes. 1 GB is equal to 1024 MB. Please note that we recommend dividing the indicated number by exactly 1024, otherwise we will get less than expected;
- Click OK. After execution, we get an unallocated partition with the number of GB according to the point above;
- right-click on the unallocated space and select Create simple volume from the menu;
- The Create Simple Volume Wizard will open. Click on Next to continue;
- specifying the volume size. We leave it unchanged. Press the Enter key;
- in the next step we will indicate the partition letter. We recommend choosing one so that it is immediately clear what information is there: V (video), F (photos), D (documents). Press the Enter key;
- at the next stage they offer to format our new volume or not. Select the following parameters:
- File system - NTFS.
- Cluster size is default.
- Volume label - leave blank or add your own label.
- Checkbox for quick formatting.
- Press the Enter key. At the final step, click Finish.
Let's summarize. We looked at how to divide a hard drive into two, placing on them the data that we are afraid of losing, using the built-in tools of the operating system. But such a function is sometimes blocked for reasons beyond the user's control. For such cases, other methods have been invented. We'll talk about them below.
Specialized programs
On the market, the leading positions among service tools for optimizing resources and protecting data from loss are occupied by: Acronis Disk Director, Paragon Partition Manager - let’s consider another free program - Partition Master Free.
Acronis Disk Director
On the main page at the top there are functional action tabs: Actions, View, Disk Management, Tools, and Help. On the left is the panel - Actions and tools. The central area is occupied by a list of volumes in tabular form and a graphical panel that displays the number of connected disks.
The division work is carried out in the graphic panel. By right-clicking on the current partition, the actions with the hard drive will be displayed. We are only interested in three: split, resize and create a volume.
The difference between splitting and resizing is that when splitting there is no right to assign a letter (it is assigned automatically). And when we change it, we get unallocated space. For clarity, we will describe both options.
Method 1
Method 2
- Right-click on the partition from which we plan to free up space and select resize the volume.
- In the block, use the arrows to change the volume size to the desired size. We look at it in the unallocated space after the volume. Click OK.
- We click on it with the cursor, and in a new window you will be prompted to click on the continue button.
- We are waiting for the operation to complete. Ready. An unallocated partition was received.
- Place the mouse cursor over the resulting space and right-click and select create volume.
- In the first step, select the basic item. Press Enter.
- Enter again.
- In the next step, select the letter, section label. We leave the rest unchanged. Press the Enter key.
- A notification to apply pending operations will appear at the top.
- We are waiting for the operation to complete. Ready. The section with our parameters is available for further work with it.
IMPORTANT! The demo version has limited functionality. The program allows you to work only with a volume of 100 MB.
Paragon Partition Manager
The program interface is based on launching wizards. To work, you only need one operation - creating partitions.
- Click on the Create Partitions icon.
- At the next step, the wizard will ask you to select the partition from which we plan to free up space and create a new one.
- The next question that will need to be resolved is to select the size (move the slider in the desired direction), check the box next to Create as a logical partition.
- Select the partition type (NTFS file system), label and letter.
- Before performing the operation, the wizard will ask one last time: Is it really necessary to carry out the changes? Check the box yes, apply changes physically.
- Ready. The section has been created.
IMPORTANT! The operation is not available in the demo version!

Partition Master Free
The program is absolutely free. The interface is built almost the same as Acronics. This program will require two operations: resize/move partition and create partition.
- Place the cursor on the partition from which you need to pinch off space for a new volume.
- Click the resize/move partition button in the left menu.
- In the window that appears, by moving the slider responsible for the size, we indicate how many GB we need to pinch off. After that, click OK.
- Now you need to make a partition from the resulting unrecognized space. To do this, click on it with the mouse and select the create partition button from the menu.
- The next window prompts you to enter a Partition Label. You must specify a letter (Drive Latter parameter). Click OK.
- For the program to perform the operation, you need to click on the Apply button (where the checkmark icon is) in the top menu.
- After which a pop-up window will appear containing information about the operation that will now be performed. Click Yes.
- Ready. The section has been created.

Which program is easier to use is up to you. Let's talk about another way to partition a hard drive. To do this, you will need an installation CD or flash drive with a system image on board.
When installing/reinstalling the system
- After loading, we go through the main window with parameters for choosing a language, time format and keyboard layout.
- Click the Install button.
- Check the box I accept the license terms.
- On the next window, select full installation.
- The window for selecting the partition for installation will load. Click disk settings.
- Links for performing operations on the hard drive will be displayed below. Select the section from which you want to pinch off a place and click create.
- Then select format.
- Ready. The section has been created.
We hope that our article has completely covered the question of how to divide a hard drive into several partitions. You can work with multiple hard drives in the same way.
“Attention This article is in no way intended for PR purposes or to convince experienced users to do otherwise. This article is just a set of modest conclusions of the author based on his own experience and changes in the IT world around us.”
The question is interesting BUT controversial. On many modern computers you can encounter a similar situation - the hard drive is divided into two or more partitions, the computer freezes when loading or the system does not start - cause: The system drive C: has run out of free space. And other logical drives are 10-20% occupied with information at this time
On the Internet, you can ask the following question: Why partition your hard drive?
And of course see very convincing answers
I, in turn, will try to refute the answers by explaining the reasons.
So let's go
WHY PARTITION YOUR HARD DISK?
Answer:
-for comfort
Refutation
How convenient is it that the disk is divided into several partitions? It takes longer to move from one section to another.
Answer:
-Do you have a closet with shelves or do you put everything in one chest?
Refutation
Why is there a comparison with a closet? Creating thematic folders on a disk (for example, movies, games, music) is much more informative than the mysterious designations Local drive C, Local drive D, etc.
Answer:
-In short, that’s how it should be!
Refutation
I agree - this has been the custom since the days when Windows 95-98 was in use and when the system was reinstalled, the new OS was installed in the same folder where the old OS was. New files were mixed with old files - which led to zero effect after reinstallation. Therefore, it was necessary to format Disk C, deleting all the information on it; at that time there were no flash drives or disks to save the necessary information, and therefore the solution was to create an additional partition where important information could be copied or even stored. In those days, computers were more aimed at advanced users or specialists and were used exclusively for work, now computers have become home computers - aimed at ordinary users who do not need to delve into the intricacies of the computer - today the computer has become a powerful multimedia and gaming device in our home. This is how it has been customary since ancient times to split a hard drive into partitions, and today no one can clearly explain why this is done.
Answer:
-for example, it’s convenient for me if the system crashes, then the files will remain on another disk, I have all the important files on another disk
Refutation
Well, if we have one logical drive C - and the system crashes - Where will our files go from the computer? They will remain in place. If we need to install Windows XP on top of an existing already installed Windows XP, then during installation we can choose actions - erase all the files in the existing Windows folder (delete everything from the folder) and install a new version of Windows there? Or create a new folder and install the operating system there (the folder will be called Windows.0), no mixing with the old system occurs, we get an absolutely functional, new operating system. No deletions occur from the local drive C - important information remains in place in its folders. Unless of course you format your hard drive. And the need to format the hard drive itself disappears. Windows Vista and Windows 7, when installed on top of an existing operating system, will automatically determine whether any operating system was installed before and will save all old system files in a separate folder called Windows.old. Again, without affecting Our information. If you install a Linux-like operating system, then during installation you will also be asked to save part of the disk with the Windows operating system and the FAT32 or NTFS file system separately, and install the Linux system on another part of the disk with a different file system from FAT32 or NTFS. And also, when you boot the computer, you will be given a choice of which OS you can boot into: Windows OS or Linux OS.
Answer:
-Convenient if you rearrange Windows. You format drive C and install Windows from scratch, but on drive D all files remain untouched.
Refutation
If you format Disk C, then all your documents from the “Desktop” and from the “My Documents” folder will disappear forever. Because these documents are physically stored on Drive C in the Documents and Settings folder. And it turns out that all the films and music will remain in place, but the documents and photographs will disappear somewhere. Please note that when installing a new version of Windows, these folders are not deleted or changed.
Answer:
-Acceleration of defragmentation and disk checking processes, because you can perform these steps at different times on each drive
Refutation
Modern disk defragmentation programs are improving every day and currently support STEALTH mode (invisible), assigning defragmentation tasks, and automatically turning off the computer when defragmentation is complete. Using these modes, disk defragmentation will take place without user participation in this process. Or in the background - while the user is working on documents or is on the Internet.
Answer:
- Yes, to separate flies from cutlets. The operating system is on C:, and everything else is on other partitions. And if the axis falls off, then the necessary files on other partitions will remain safe and sound
Refutation
And finally – Games. All programs are installed on the C drive by default. The installer does not know whether there are any additional logical drives on the computer. To install the game in another partition, during the installation process of the game you must independently select a disk and a folder different from the proposed installation option on Drive C. Which in turn causes inconvenience and confusion during installation. I came across games that were installed only on Drive C:, or without the ability to select a drive for installation at all. Most users use a computer for games and entertainment - and why should they delve into the intricacies of installing a game if they just need to install the game and play. So it turns out that everything is installed on Disk C, while Disk D and other local drives remain free or partially occupied.
RESULT
Of course, I don’t insist that you should never split a hard drive into logical drives - I just came to the conclusion over time that it’s better to make one whole hard drive. This will eliminate a number of the problems described above related to the stability of the computer and the availability of free disk space. If the hard drive fails, it will happen as a whole, not in parts. (28.12.2010)
UPDATE —03.2013—
Later 2 years I also have not changed my opinion that there is no need to partition the hard drive into partitions; for myself, I have long been using the scheme of 2 or more physical disks in a computer:
1. Disc– System (for this, it’s better not to spare your money and buy an SSD drive.) It’s best to take a disk with a capacity of 120 GB or higher. Tested 60GB SSD on myself - installed the system and main programs - only 10-15GB of free space (constantly have to be monitored)
2. Disc– multimedia, entertainment, games, storage, in general, everything you need. (Regular HDD capacity 1-2TB)
The skill of dividing storage devices can be useful to any user. This function is useful when allocating space for the OS and other files. Also, when installing and configuring a new drive, you need to split it into 2 parts. This will allow you to save personal data on the second partition if you reinstall the entire system, which is located on the first part. Let's figure out how to split a hard drive into 2 parts on Windows 7.
Disk Management
If you need to partition the drive as soon as possible, then use standard OS tools. Windows 7 has a convenient Disk Management application that will allow you to partition your hard drive in just a few clicks.
This utility is available on Windows 8 and 10, so you can use this universal instruction.
So, let's move on to the division procedure:
- First, open Disk Management. The fastest way to do this is by searching in the Start menu for the request from the screenshot.
- You will see a list of all connected hard drives in the form of a table. Below is a visual diagram of the distribution of space on the device. Since you need to divide one space into two, right-click on the desired disk and select the “Shrink volume” action.
- In the new window, specify the size of the compressed space - the space allocated for the new hard drive partition. After specifying the size in megabytes, click on “Compress”.
- After this procedure, you will see that a new partition with the volume you specified has appeared in place of the previous disk. And next to it is an area labeled “Not distributed.” From this space you need to create part 2. To do this, click on “Create a simple volume” in the context menu.
- On the first screen, click Next.
- Specify the size of the second volume.
- Select a drive letter and click Next.
- Switch the setting to the bottom position to reveal more options. Specify the file system type as NTFS and enter the volume label (the name that appears in Explorer). Click on “Next”.
- To finish, click the “Done” button. Now this media is divided into two volumes. The first one retained the letter and name from the previous one, and the second one received a new label. You can close the application.
Space on new hard drives may not be allocated by default. Therefore, you don't have to shrink the volume, but simply create two new ones.
If your hard drive appears as dynamic in Disk Management, you need to convert it to basic. But before that, copy all data to a safe place.
Command line
The same procedure can be performed via the Windows command line. This option is not so convenient, but with the help of our guide you can use it if necessary:
- First you need to launch a command prompt with administrator rights. In the search, enter the name of the program and select the appropriate launch option through the menu.
- Now you need to use several commands in a row that will help split the disk. First of all, enter and execute it with the Enter key. Using the list volume command, open the list of HDDs and SSDs connected to your computer. Now determine the number of the disk that needs to be divided. You can recognize it by name or size.
- Enter the command select volume X, where the volume number is indicated instead of the letter X. Then you need to specify the size for the new local disk. To do this, use the command, where instead of the letters Y you need to enter the number of megabytes. It is by this value that the selected disk will be reduced.
- Now use the list disk line to see a list of connected media. Remember the number of the hard drive on which the partition is being performed and enter (N – disk number).
- At this stage, you need to run 3 commands in a row: , format fs=ntfs quick , assign letter=Y (Y is the letter of the new partition).
- To complete the markup, exit with the exit command.
Using these methods, you can not only create two partitions, but also repartition the new parts into smaller volumes. It all depends on the goals and purpose of your hard drive.
Minitool Partition Wizard Free
There are a number of applications that repeat the functionality of the standard Disk Management utility. Some of these programs have a wider range of capabilities. Let's figure out how to repartition a hard drive using the free Minitool Partition Wizard Free utility. First you need to download it from the official website and install it on your computer. After this, follow these steps:
- Launch the application and right-click on the disk whose size you want to resize. From the list of actions, select an option
- Now specify the size of both partitions. This can be done using a digital counter or a slider. After that, click "OK" and the creation of two disks will be completed!
This utility will also help you merge several partitions, convert them to basic ones, format space on a PC or laptop, configure a split volume, and much more. An analogue of Minitool Partition Wizard Free is software from Acronis – Acronis Disk Director, which can be downloaded from the provided link. A license is required to use all functionality.
Users can change the names of sections. You can even rename the system volume. Open Windows Explorer, select the “Rename” action through the context menu and enter the desired name.
Division during installation
We considered all options for separating drives from under the operating system. However, you can mark up space during the first installation or when reinstalling Windows. For this you need.
Splitting a hard drive into logical parts is a very convenient function of operating systems. According to MicroSoft technical documentation, it is recommended to reinstall Windows once a year, and you can always save the information on a non-primary partition. There are three main ways to split a hard drive into parts:
- When installing the system, set the appropriate partitions.
- Shrink a volume on an already installed system.
- Use third party software.
Step 1. When starting your computer, launch the BIOS and increase the boot priority of the drive.

On a note! You can start from the drive differently: wait until the hardware functionality test begins and, by opening the boot menu, mark your optical drive, internal or external, as the primary device.
Step 2. At the initial installation stage, the system prompts you to install specific drivers for system SCSI devices or RAID disk arrays. This page can be ignored.
Step 3. The next stage of installation is the license agreement (EULA). To go to the next page, press F8. If you refuse to accept the terms of the agreement (ESC), the installation is aborted.

On a note! The agreement changes in accordance with the release of new builds and service packs. Be careful when installing; using unlicensed software may result in litigation. For example, according to the civil code of the Russian Federation, the copyright holder has the right to demand compensation for damage from a citizen in the amount of 10,000 to 5,000,000 rubles; according to the criminal code - a fine from 200,000 to 500,000, or imprisonment from two to six years. For legal entities and officials, fines are established in accordance with the Code of Administrative Offenses.

Step 5. Continue installing the operating system. After the installation is complete, you will have access to two logical volumes, instead of one.
Partitioning a hard drive by compressing it using a snap-in
Step 1. Open any folder. In the left frame of the window, find the “Computer” icon. By calling the context menu, go to the “Management” section.

Important! To work with disks, you must have administrator rights.
Step 2. Expand the "Storage Devices" list.

Step 3. Open Disk Management.

Step 4. Select the volume you want to shrink, right-click on it and check the “Shrink Volume...” option.

Step 5. Wait for the volume polling process to complete.

Step 6. Specify the amount of disk space allocated for the new partition. The process begins by clicking on the “Compress” button.
![]()
Step 7 Wait for the unallocated space to appear on your hard drive. And create a simple volume by calling the corresponding button.

Step 8 Specify the size of the new disk and proceed to the next page of the wizard.

Step 9: Assign a drive letter.

On a note! The letters "A" and "B" are reserved for floppy drives. A kind of atavism, but these characters are reserved.
Step 10 Format the volume with the desired file system.

Important! Take your time and uncheck the “Quick Format” box. The process is longer, but corrects errors in damaged sectors.
Step 11 Complete the wizard by using the “Finish” button.

Partitioning a hard drive by compression via command handler
Step 1. To enter the command processor, you need to expand “Start” and enter the “cmd” key in the “Search programs and files” line. The launch must be made as an administrator.

Step 2. There is a special “diskpart” section for managing hard drives. You can enter it by entering the command of the same name.

Step 3. To display a table of your computer’s disks, use the “list volume” command.

Step 4. To select a specific volume, use the “select volume x” key, where x is the volume number from the first column of the table.
Important! Please note that the disk is accessed not by name, but by number.

Step 5. The space available for compression is determined using the “shrink querymax” request.

Step 6. The “shrink desired=y” command, where y is the amount of disk space, separates a logical volume of the specified size.

Important! Remember that volume is measured using programmer categories and not the SI system. One gigabyte is not 1000 megabytes, but 1024, take this into account when dividing. When entering the command, do not forget about the syntax - the key "desired", the "=" sign and the size of the new volume are written together.
Partitioning a hard drive using third party software
One of the most popular software products is “EaseUS Partition Master”. This product has both a professional version (paid license) and a free one.
Step 1. Open the main program interface of the program.

Step 2. Select the volume to be compressed.

Step 3. In the left frame, use the “Resize/Move partition” button.

Step 4. Specify the size of the freed up disk space in the “Unallocated Space After” box, or by moving the right slider of the volume indicator. Confirm the start of the compression procedure by pressing the “OK” button
![]()
Important! Please note that the program provides an optimization option for solid-state drives (OptimizeforSSD). Differences in data storage between standard (HDD) and solid state (SSD) is thatSSDs do not require defragmentation, so the optionoptimizeforSSD will save you time.
Step 5. Wait for the process to complete.

Video - How to partition a hard drive
Video - How to partition or partition a Windows 10 hard drive
Conclusion
We have described four techniques for partitioning a hard drive. Of the methods described, only one requires additional software. The evaluation of each method is given in the summary table.
| Information\Name | Formatting the hard drive | Equipment | Command line | EaseUS |
|---|---|---|---|---|
| License | Delivery with operating system | Delivery with operating system | Free |
|
| Russian language | Depending on Windows version | Depending on Windows version | No |
|
| Interface convenience (from 1 to 5) | 4 | 5 | 4 | 5 |
Often new PCs have a single system drive “C”. How to partition a Windows 7 hard drive yourself? The main thing is that all actions performed by the user are safe for the computer and the methods of partitioning the hard drive are easy to implement.
All these requirements are met by a method using the functionality of Windows 7 itself. Simplicity is ensured by using the standard operating system explorer.
What is this for?
The main argument in favor of dividing the hard drive into partitions is the security of the user's files stored on the computer.
For example, if it is necessary to install an OS, you will definitely have to resort to formatting the system partition “C” and if the computer owner does not have time, for a number of reasons, to copy all of his data to the memory of another hard drive, laser disk or flash drive, then all information important to the user will be irretrievably lost.
This often happens when a computer is infected with malware. Therefore, it is not recommended to keep important information on the system partition “C” of the PC. Partitioning your hard drive into several partitions in advance will help secure stored files in your PC memory.
Important note! It is advisable to proceed with the instructions below only if the hard drive memory in the user’s computer has enough free space for the normal functioning of the operating system.
Process of partitioning on working OS
The following steps are required:


How to create partitions during installation of Windows 7 on a computer?
This method is used during the operating system installation process. Mostly, the hard drive space is divided into 3 parts (although there are exceptions, depending on the personal preferences of the computer owner):
- System:
- For work;
- For storing photos and media files.
The algorithm of actions is as follows:
How to create partitions using third party software?
First, you will need to download the necessary program from the Internet and install it on your computer, for example, “Partition Magic”, “Acronis”, etc. Next, let's look at an example using the Acronis application.
We also recommend
 Partitioning your hard drive
 How to partition a disk with Windows installed without losing data
 How to remove ads from YouTube so you can enjoy watching your favorite videos
 Hashtags - why they are needed and how to use them What are tags and hashtags
 Where to put stress in a word at the same time How to find stress in a word
 Email clients for Windows - ranking of the best Standard email client for Windows 10